Wednesday, July 27, 2011

Quilt Class 101 - The BIG REVEAL!!!!

The Big Reveal... We have FINISHED!!!....
It has been a whole lot of fun!!
I hope you have enjoyed the class over these past few months...
Are you ready for more Quilt Class 101???
Starting September 7th.... Quilt Class 101 will continue.
 Now that you have all made your first quilts or have brushed up on a few of your techniques... We are on to the next part...
 Quilt Blocks and Techniques.
We will have the same weekly Classes.. Every Wednesday there will be a tutorial to teach you a new Quilt block, or a new technique such as paper piecing or applique. I have a great list of Favourite bloggers jumping on board such as
 Retro Mummy, A cuppa and a catchup, Quilt Story, Me a Mom?, Miss Print, Quilt Jane, Sew Jess, Ellison Lane Quilts....and many more!!
 If YOU would like to take part and teach a tutorial here on Quilt Class 101... Just contact me HERE. Send me through the Quilt Block or technique you would like to teach us and perhaps you can be one of our teachers....?? Sound fun?? 
Now for our Big REVEAL...
 I received a couple emails this week of YOUR finished Quilts. And i must say... I really am so impressed with your very first Quilt!! They are all, WAY better than MY first Quilt!!!
Congratulations... You should all be so proud of yourselves. I really love each and every one of them..


Kelly from Irene Design - I love your design Kelly... Maybe Patterns one day?
Roslyn made these two gorgeous Quilts
(front)
(back)
and this one
Front and Back

Lainie made this beautiful bright Quilt..

and Julie-anne decided she couldn't just stop at one either...


You can also add your 101 Quilts to the

and Thank you so much to each of you for sharing your Quilt process with me... It has been so touching hearing from each of you along the way. I'm so glad that we were all able to help you get there and create your first, of many Quilts... Beware it is a little (OK maybe ALOT) Addictive!!
signature

Sunday, July 24, 2011

TOFW

I spent the most amazing day yesterday at
I wish I could go again next week...I just cannot wait for the next one.

 Time Out for Women is an inspirational event for women. Attendees are treated to messages of inspiration from respected authors and music artists. TOFW offers a day of learning, laughing, and lifting of spirits. It's a great opportunity for women everywhere to gather and get recharged through motivational messages and music.

It's the TIME OUT FOR WOMEN 2011 TOUR.... CHOOSE TO BECOME just a little closer to the woman you were meant to be - through your testimony, through your relationships, and through your personal improvement.

We had some outstanding Presenters.


My mind is buzzing..so much info to take in and things to contemplate over... My job for this week is to sit and read through my notes and write a few lists... and I have a few Quotes to put up on my mirror, in my kitchen cupboard and on the fridge! 

I thought I would share them with you for some food for thought...

To Become what we want to be, We need to be what we want to become.

Your thoughts make you who you are. If you think negative thoughts..you will be a negative person. If you think positive thoughts you will be a positive person. How many Positive/Negative thoughts are you thinking each day...Hilary Weeks shares more on her blog HERE

Be kind, Everyone you meet is facing something difficult. Sister Hinkley

Enlarge your perspective..

Don't you dare be the one thing standing in your way.

Beware the temptation to retreat from a good thing.

Don't give up...Finish the race.

Prioritize and cut out the distractions.

God is more interested in the offerer than the offering.

Be more interested in the long after than the brief present.

'Sometimes we act as though we are going to stay here, we aren't, we can't and we wont'. Elder Holland

For me, I felt uplifted and inspired. It made me remember to cherish the important things. Remember why we are here and where we are going. To not get caught up in the little things. To focus on an Eternal perspective. To sit, cuddle, love and teach my children.. as they wont be children for long. Instead of wondering when the storm is going to pass... I need to 'dance' in the rain.  

We were also able to give service.....As a part of the CHOOSE TO BECOME TOUR we were able to be involved in donating items and assembling POSSIBILITY PACKS. These are similar to a "hygiene" kit, but will include items specialized to give women the opportunity they need to get back on their feet and BECOME their BEST selves. We were able to donate over 400 packs to NSW Womens Refuge.
Time out for Women also have a website , facebook  and you can sign up for their newsletter HERE...
It was such a wonderful event. It gave me the strength I needed and Inspired me to become better.
signature

Wednesday, July 20, 2011

Do you Label your Quilts???

Have you nearly finished???
I hope it has all been smooth sailing up until this point... If you have struggled over some point during the class, don't be disheartened! I still learn something new (and something I shouldn't do ) each quilt I make, and we all know over time with a little practise our quilts get better and better...

If you have followed along with the class and made a quilt I would love to see it...
Next Wednesday 27th will be the Big Reveal!!
If you could email me through a picture of your finished quilt, or maybe your project where you tried something new from what you learnt... I would love to see them and share them here in the main post... AND if you have a blog, email me your details and I can link them up to you... I will also have a Linky at the bottom so you can link up more pictures of your finished Projects!

I hope you have enjoyed the class over these last weeks/months. It has been alot of fun sharing what I know with each of you.. and I have loved the emails back and forth asking for HELP!!. For those of you wondering...
over the next few months and next post I will share more info and how YOU can be apart of the next segment!!!

Now, To add the finishing touch to our Quilt....
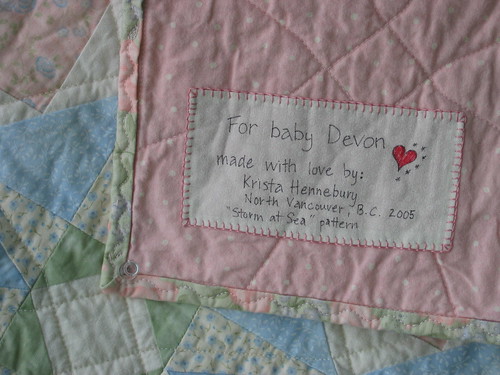
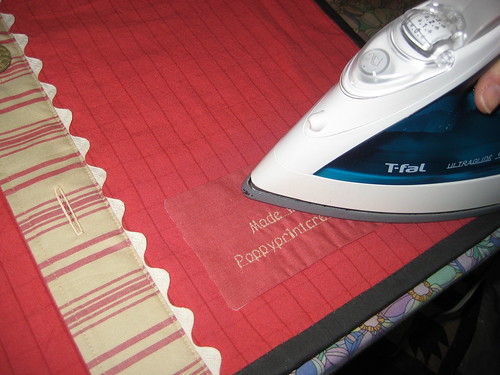
1. Mini Quilt Label , 2. dqs10 label received from Where The Orchids Grow, 3. Spoonflower Quilt Labels, 4. Tula Can Quilt label, 5. PQS4 Back of the Label for my partner, jgmehlin, 6. Wave quilt - label, 7. Quilt label, 8. DQS9 Label Done for ?, 9. Wesley's quilt: label, 10. Beehive quilt - label, 11. Geo Go Go Tag, 12. Behind the Quilt

We all need to add a label....
 Krista from the great Poppyprint Blog has shared her wisdom with us...

Hello all! Thanks Rebecca for letting me sing the "Label your work" gospel here at Quilting 101 headquarters.
How many times have you read blog posts about incredible antique quilts that end with "if only I could remember who made this...it might have been my grandmother, or possibly her sister, actually now that I think of it, my husband's sister's mother-in-law's great aunt also quilted, so maybe it came from her?" We make quilts because we love them. We share quilts with our family and friends because we love them more. So why not provide your signature and a date so that they can sing your praises and honor your work for years to come?
IMG_5017
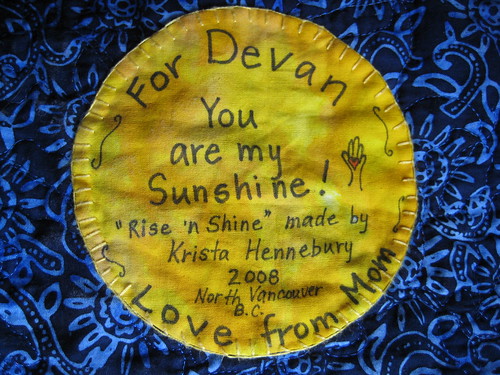
On a quilt for my daughter
 
Professional quilt appraisers recommend attaching a label to the bottom left corner of your quilt backing PRIOR to quilting your quilt. That way, the label is 'built right in' with quilting stitches and less likely to come loose with washing. It also guards against quilt theft or loss, which is unexpected, but sadly can happen to quilts sent internationally for shows and competitions, or for gifts. NOTE: Another advantage of attaching your label at this point is that you can sew it onto your quilt back by machine!
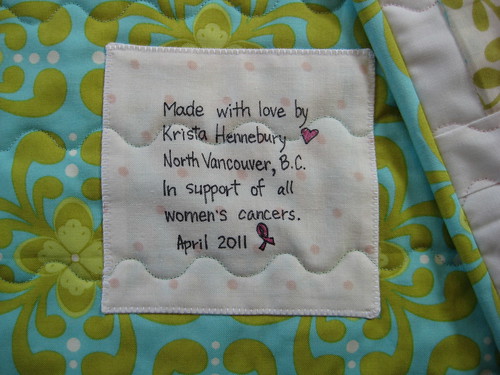
Raffle quilt label
Hand written label, machine appliqued prior to sandwiching/quilting.
 
Labels can be super basic. A piece of muslin written on with a permanent fine tip marker (my preferred is a black Identi-pen, which is double ended with a fine and medium tip). You can also achieve lovely writing on fabric with a Micron pen, which come in myriad colours for added fun.
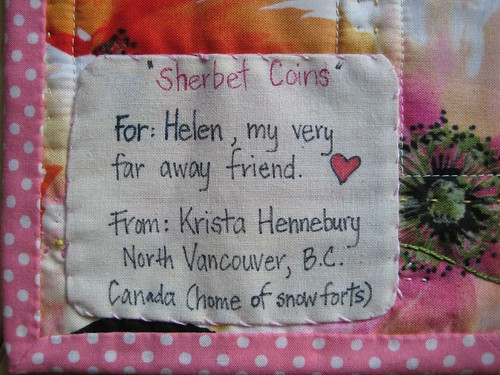
Sherbet coin label
A simple, hand-written muslin label
 
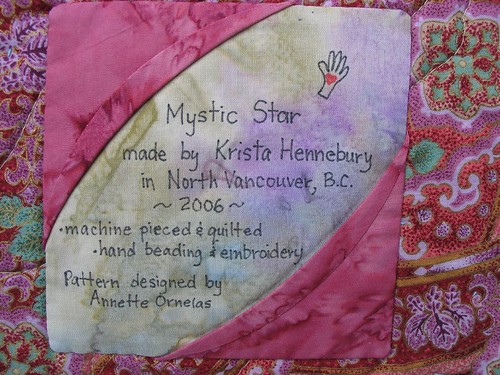
Labels can be more intricate, too. Try mimicking a design element from the front of your quilt, like I did (below) using folded bias edges for the back of my Mystic Star quilt.
Mystic Star label
This label mimics design elements on the quilt front and credits the pattern designer.
You can print photos and text onto treated fabric through your home printer. You can also embroider the details and secure the edges of your label with a lovely hand blanket stitch, (as below).
119_1901
This quilt was a baby gift for a friend's daughter.
How about busting out those machine alphabet stitches (like I did for the first time on this project)?
Label tutorial 6-country red 160511
Labels should include the quilt maker's name and the date the quilt was completed at a minimum. Other pieces of information to consider include: your hometown, the recipient's name, the quilt's name (if it has one), the occasion or event commemorated by the quilt, a meaningful quote or passage, a list of contributor's names if it is a group project, a credit to the pattern designer, or anything else that is relevant to you, the quilt maker!
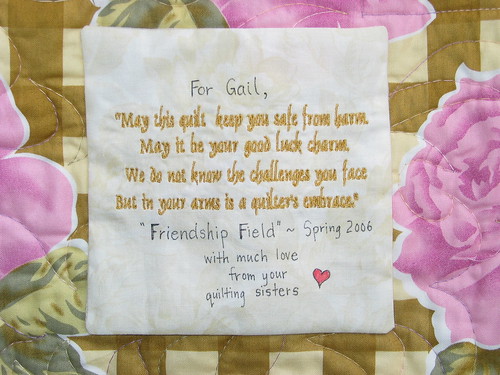
friendshipfieldlabel
A label on a cancer comfort quilt made by quilters who had each signed their block on the front.
My favourite method of attaching a label is outlined in this tutorial, illustrated through a series of photos in a flickr set. If you don't have access to lightweight non-woven fusible interfacing, you can achieve the same result with a used dryer sheet, except that you'll have to pin or glue-baste your label to the quilt back instead of fusing it. This is such a convenient way to secure your label's seam allowance for easy applique.
I'll be the first to admit that quilts intended for my own home sometimes go unlabeled. I'd never sell or give away a quilt without a label, though. It takes many hours of labour and love to create a quilt and I am proud to attach my name to my work! I hope you will, too. That way, when your great, great granddaughter pulls your quilt out of her hope chest to share with a friend, she can proudly tell her exactly who made it and when.

Thank you so much Krista, I have to admit... I sadly have never labelled a quilt!! Shame on me!! I also remember seeing this great label tutorial from Jaybird Quilts...They looked great.

If you have a label or labelling idea you would like to share... Link up below!!


signature

Sunday, July 17, 2011

Fusible Thread Tutorial - Featured Blogger Amelia

Has anyone heard of fusible thread??
Up until a few weeks ago.. I hadn't! Nor had I any idea what to use it for... Lucky for me there are so many people out there WAY smarter than me that can help us along....
So, I'm excited to Introduce you to another Featured blogger... Amelia from Stitch 'n' bits. She has a tutorial for us, using Fusible thread with binding...
and a GIVEAWAY to win a spool of fusible thread to try....
 Amelia you have my full attention!

Hi, I'm Amelia and I'm really happy to be here on Bec's blog (which I absolutely love) to share a little tutorial about fusible thread and machine binding.

My favourite part of making a quilt is picking out the fabrics and piecing the top, closely followed by binding the quilt. The reason that I like the binding stage so much is that I can see that the quilt is so close to becoming a beautiful and functional item. It means I'm nearly finished and I'll soon get to see the look on the face of the person that I'm giving the quilt to!! I love it :)

The good thing about the method I'm about to show you is that it gives me a sturdy binding and is quicker too. I have tried all sorts of methods and still love to hand bind, but this just gives you one more option.

Here's the quilt that I'm going to bind. It's 20 inches square and I'm making it into a cushion cover:

First up, you make the binding and attach it to the front of the quilt as you usually would. I make my binding using 2.25 inch wide strips because I love a snug fit on the quilt, but if you like a wider binding or looser fit on the quilt, use 2.5 inches or whatever you normally use. Bec has a fantastic tutorial on binding that will get you started.

Fusible Thread ....
 I've only tried Benz Fuse but there are many different brands out there. If you google "fusible thread" you should find a brand that you can purchase near you.

I have seen many uses for fusible thread online (applique, hemming and binding just to mention a few) and many different ways to use it when binding too. I'm not saying that this is the only way or the proper way, this is just the way I do it. So feel free to have a play and see what works for you!
So let's get started ........


1. WIND BOBBIN: First up, wind the fusible thread onto the bobbin. Do not thread the machine with fusible thread!!!
2. ZIG ZAG: Working from the top side of your quilt, along one side of the seam allowance of your binding stitch a small to medium  zigzag stitch. The zigzag allows the fusible thread to cover a larger surface area than a straight stitch. It's important to stay inside the seam allowance!! Stop just before the next corner mitre.
Repeat with the other 3 sides of your quilt.

3. PRESS: I place baking paper under the binding to stop the fusible thread from potentially melting onto the ironing board (you could also use an ironing cloth instead of baking paper too).
Then on the front side of the quilt  "press"  (please don't "iron" back and forth) the binding out over the edges so it can be wrapped around the side of your quilt. Once again I use the baking paper under the binding to stop any loose threads sticking to my iron. Do this to all four sides.
Turn your quilt over and from the back side press down the binding, mitring the corners as you go (baking paper on top this time). I press each section for approx a count of 10, but read your manufacturer's instructions to check the recommendation for your fusible thread.
It's important that you make sure that the binding on the back covers where the binding is stitched down from the front.
 (Back)
(Front)
One of the good things about fusible thread is that it holds the binding down firmly so you don't need any pins or clips. You should still be able to lift any sections that aren't quite right and re-press them if you require though.


4. STITCH: I don't have a preference between hand stitching or machine stitching the binding down. I use both methods depending on the quilt and it's use. E.g. I'd probably hand stitch for an heirloom quilt or something where I don't want the stitches visible on the back side of the quilt, but I'd machine bind a quilt that is going to be robustly used and frequently washed. So the choice is yours, if you would like to hand stitch the binding, feel free to do so and once again you can follow Bec's fabulous binding tutorial to complete your quilt.

If you choose to try machine binding , please follow along with the rest of this tutorial ...

Part way down one side of your quilt, start stitching in the ditch along the seam where you attached your binding.
Once you've sewn a few inches, take a glance at the back of the quilt and make sure that you are catching the binding on the back as you sew (you might want to check this a few times as you sew around the entire quilt).
Slow down as you get to the corners, this will help you be more accurate with catching the binding fabric on the back of the corners. Sometimes I pin the corner mitres before I start stitching and remove them as I get to each pin. 
When you get to a corner, stop, pivot and continue down the next side.
Repeat for all four sides of the quilt. Overlap the beginning and end stitches slightly. Clip your threads.

The stitches should be nearly invisible on the front.
Turn your quilt over to check that the binding is stitched down fully on the back of your quilt. I like the stitches to be a few millimetres (approx 1/8 inch) away from the edge but they might be a bit further away if you've chosen to use a wider binding to start with.
If you've missed a couple of little spots on the back, please don't freak out! You can either restitch that small area by machine from the front or catch it with hand stitching from the back.
AND YOU'RE DONE!! Use & enjoy :)
Thanks Bec once again for having me. I think your Quilt Class 101 is fantastic and I can't wait to see all the finished quilts!!

What do you think??? I want to try it. Thank you for Sharing that with us...
AND
If you would like to WIN a spool of fusible thread to try??? Amelia is having a GIVEAWAY on her blog HERE right now...
Thanks Amelia!! xx

Wednesday, July 13, 2011

Quilt Class 101 - Week 12 - Binding

OK.. are you ready?
First Step, is to find out how much fabric do you need?... Get out your calculators...
 Do this by adding 2 x width and 2 x length. So, My Quilt Top measures 
2 x 50" + 2 x 58" = 216"
then divide 216 by 44" (width of fabric) = 4.9
So, you need 4.9 or 5 Strips to get you all the way around. I always add an extra just in case... So 6 Strips.
Your strips need to be 2.5" wide, so you need 6 x 2.5" = 15" of fabric
Still following?? You can work it out quickly in your head once you get the hang of it.
Cut your 6 strips, 2.5" wide.
 With a 1/4" seam allowance, join them them all end to end, so you have one long continuous strip. You can do a diagonal seam to reduce bulk, but i don't usually.
 Press seams open.
 Next, with wrong sides together, press your strip in half length ways...
 I always start at the bottom of my quilt.  Lay your binding strip on with the raw edge of your binding along the raw edge of your quilt top. Leave around 6 inches and place a pin to hold in place.
 Start in front of the pin you just put in,With a 1/4" seam allowance and your walking foot, sew down a few stitches and reverse to secure. Continue sewing along, 1/4" in from the edge, until you reach your first corner.
 When you are 1/4" away from your first bottom edge ( or next side ), put your needle down. Lift your presser foot .
 Swivel your Quilt and instead of continuing to sew down the next side.. you are going to sew backwards off your quilt top
 Secure with a few reverse stitches. Pull your top out of your machine and cut your threads.
 Take your binding strip and fold it up 45 degrees... See below.
 Then fold it back down on itself. This will give you a neat mitre corner.
 Now, Continue to sew down this next side. Remember to do a couple reverse stitches again in the begging to secure.
 Sew all around your quilt, mitring your corners as you come to them. When you get close to where you started... Stop about 8-10 inches away and Reverse to secure.
 Take your quilt top out of your machine and lay on a flat surface. Take your ruler and measure the distance between your two spots.  Another formula for you..
 Mine was 8 inches, So,
8 inches + .5 inch(seam allowance) = 8.5"
Divide by 2 = 4.25 inches.
Next, Measure and cut each binding end... Mine needed to be cut 4.25 inches long. You will cut yours differently depending on your measurements.
 With right sides together, pin to hold.
 With 1/4" seam allowance sew these two binding ends together.
 Fold out and lay flat and
  sew this down onto your quilt... You have now finished the machine sewing part. Almost done!
Take your scissors
 Cut off the extra batting all around the edge of your quilt. Take care cutting around your corners.. you don't want to cut a hole in your binding.
 Iron your binding out flat
 Fold your binding back over to the back of your quilt.
 I always fold mine just over the sewing line so you cant see it.
 With a slip stitch... Sew in place.
When you get to the corners, the side you were sewing goes under first and the next side folds neatly over top...
Continue all around your edge and your done!!!! A BIG CONGRATS to you!!!!
 and Congrats to all of you who read ALL the way down to the bottom of this post!!!
If you have a binding tutorial you would like to link up... you can link up below...


signature