Thursday, March 22, 2012

19-21st March, Chase's Anniversary

I sat here yesterday all day with this blog post open....
I wrote then deleted, wrote then deleted, wrote more then deleted again.... I was at a loss on what exactly i wanted to say... So i wrote nothing.... and after thinking about it today, I have decided to just share a couple pictures with you....
These past few days have been the birthday and anniversary of my sweet baby Chase dying. The last few days have been difficult. In fact... the whole month of March has been difficult. 
 
Most of you will know that On the 21st March 2010 my son passed away. My Quilting addiction and blog started because i needed an escape to help me get through each long day.  Each day is difficult. And as time goes by I keep thinking it will get easier. 
 Some days it does, i feel like i will survive and that although i desperately miss my little boy.. i have so many things to be grateful for and live for.

Our family zoo trip for Chase's Birthday... and my 32 week preg belly.
But then there are days where I often sit and wonder if i will survive... Why does it hurt so much. Why the death of a loved one is so difficult to deal with. Especially the death of your child. Why it affects every part of you. Why it changes you.  
Chase was only 2 days old when he died...

We were eagerly awaiting a new little baby to come into our family.. only to have to say goodbye to him much too soon. For those of you who have lost a child, know the incredible pain that becomes apart of you. Part of your daily struggle, part of the new and different you.
 
So, Last year with the anniversary approaching, we decided to go on a family holiday so that we would all be away together and help ease the anxiety...
This year we spent the weekend together.
We went to the zoo..

We had fun watching the animals...
And on the Sunday we went to visit his grave...
We're really lucky in the fact that 30 years ago my grandpa purchased a whole section of plots together. Chase is buried next to my grandma and grandpa and uncle Jordy. Its a section in the cemetery that we can plant plants in and tend to it instead of just a little plot all on his own... It was nice to go this year and have the Tibouchina tree that I planted for his birthday last year flowering and thriving...
Chase's Grave... Hopefully over these coming weeks i can work up the courage to call and organise his headstone. This has been one of the most difficult things for me... 
I really miss him, but I am grateful for the knowledge and comfort i get from my beliefs. That one day we will be together again. That we are sealed together and will be a forever family..
signature

Wednesday, March 14, 2012

New Quilt and Quilt Pattern- Trinket Box

The lovely Catherine, Editor of the Australian Homespun, approached me last year to design and write a new pattern for her magazine.. I had had this one floating around in my head and figured it was about time  got my act together and wrote another pattern. You can grab yourself a copy of my new pattern Trinket Box in this months Australian Homespun Magazine No. 106  Vol 13  No. 3
For those of you who aren't able to grab a copy.. this pattern will be available in my shop in about 8 weeks time... 
This was a fun project and i was all ready to whip it up... when I fell pregnant and as you all know.. slipped into a time warp. I couldn't even raise my head to email or blog... so sewing was definitely out of the question. A good friend of mine... Leanne came to the rescue and offered to sew up this little baby for me... so i could still make my deadline and get it into the mag.. Leanne your an angel!!
This quilt measures 60 1/2" x 60 1/2". 
 Its made using 16 Fat Quarters from Joel Dewberry's Heirloom range. The background fabric is Patricia Bravo's light cream and green paisley print.
 I haven't had a chance to photograph it yet... Its still with the Homespun team travelling to a few craft shows.. So if you happen to see it.. take a picture for me! I'll share some better pics and details of the Quilt once i can get my hands back on it.  I can't wait to show you details of the Quilting....
Leanne professionally machine quilted it for me. She has some great close ups you can see HERE on her blog.
 Now that I've moved house and a little tight on space.. I've decided to list this quilt for sale  in my Etsy shop when it comes back to me... Let me know if your interested in purchasing it and ill keep you posted when it goes on sale. 
Oh, and If you are lucky enough to get your hands on this Easter issue... You will also find this great project. A Garment Bag! Ive been wanting to make one for ages just hadn't quite found the perfect pattern. This one looks like it could be a winner!!  Gorgeous hey! 
So much to Sew... So little time xx

signature

Wednesday, March 7, 2012

Baby Sewing - Baby Sleeping Bag

We have had a busy week here at our house. We moved..... Yes Moved house!! SO, the last few weeks have been spent packing and sorting, and sorting and packing... and...I am pleased to say that we are in! All settled and unpacked and looking forward to our new adventure here. 
Amongst all the stress of moving house, I did manage to get a little baby sewing done....
This Baby Sleeping Bag/Snuggler.
It was one of the things on my To Do List, that i can now tick off!
 This snuggler was really fun to make. All up, it took a couple hours, and i def have plans to make a couple more. This project was actually the main reason i bought this book.
Simple Sewing for Baby
 by Lotta Jansdotter.
 She has lots of cute patterns and ideas 24 to be exact, and very good for a beginner sewer. I have had this book for a couple years and glad i finally got around to putting it to use!
The pattern asks for 1 Yard of Medium Weight Cotton and 1 yard of Micro Fleece. I used regular Quilting Cotton, Zoology by Michael Miller and a charcoal Polar Fleece. I am really pleased with the thickness and weight and love how it turned out. Its not too thin, and not too thick. I think it will be the perfect weight to wrap a baby for winter.
 The hardest part about the pattern was figuring out where to position the Velcro.
 But you pretty much sew the whole thing... and position the Velcro at the very end. So you can see exactly where it needs to go.
Then the left side wraps over and Velcros in place at the centre..

and the right side folds over the left and holds your baby snug. The Velcro strips are quite generous so it would fit any size baby and prob last (I'm hoping) a couple months... 
Pretty cute hey! I recon you could also make it with Quilting cotton both sides with batting in the middle. OR... If your having a summer baby.. Maybe Quilting cotton with just a flannel, so its not so hot? I might give that a go and see how it works out.
Wanna make one??
For us Aussies you can purchase it HERE
 and for you Amazon lovers.. You can find it HERE..
signature

Sunday, February 26, 2012

Gotto Love Fabric...

More Fabric...?? Yep Ive been shopping again... This time from
Take a looksy!

This "Children at Play" Fat Quarter Bundle  by Sarah Jane for Michael Miller Fabrics.

My baby boy is due May 16th. In May, it will be getting cooler for us here in Australia as we head into winter... so I really wanted to find a cute boy fabric in a flannel.... This is perfect! I LOVE this range! I'm thinking of a new quilt design?? Maybe kites? or I do love the "Kites in the Clouds Quilt" that Ashley from Film in the Fridge made... so maybe something similar to that one?? or Maybe Rockets???
mmm decisions...

I couldn't go past grabbing a little of Annela Hoey's Little Apples Range with these cute turtles. Paired up with some fabric from my stash.

These cute "Get Together Navy Squirrels" By David Walker..

 My Chevron and Michael Miller Dumb Dots.... with the New "Backyard Baby" by Patty Sloniger


More Michael Miller Dumb Dot with a charm pack... Cape Ann for Oliver + S.       

 I LOVE Fabric shopping.... and believe it or not... I actually have a few baby projects finished...Ill show you soon!
and FYI....
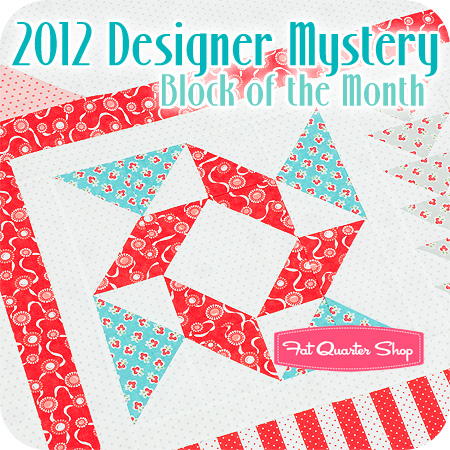
 The Fat Quarter Shop have just launched their 5th annual Designer Mystery Block of the Month Quilt Club. This sampler quilt features 12 wonderful blocks from Moda designers such as....
 Aneela Hoey, Blackbird Designs, Bonnie & Camille, Bunny Hill Designs, Cosmo Cricket, Fig Tree Quilts, Me & My Sister Designs, Kate Spain, Minick & Simpson, Pieces from My Heart, Primitive Gatherings and Sweetwater.
AND
 features the Vintage Modern collection by Bonnie and Camille...
Looks like Fun!!! For more info.... You can read more about it HERE 

Happy Sewing...
Oh... and...
I'm clearing out my cupboards to make some room for some new Quilts... So if you wanna buy any of these???
You can find them HERE 
Thank you!! xx
signature

Tuesday, February 21, 2012

Gorgeous Garter...a Quick How To...

For a little pressie for my sister, I wanted to make her a garter to wear on her Wedding Day. I looked around for a few tutorials and although I found a couple, they were all a bit old fashioned and nothing I really liked. Which left me on my own to figure it out.. :/

After a few trials and errors... I finally figured out just how i wanted it to look.
I wanted it to be made of tulle. I wanted the tulle to look gathered even when it was stretched out on her leg. I wanted the ribbon to not be too ruffled. I wanted diamante and a bit of bling...
So..... Here it is...
I thought i would share a quick how to.... for all of you... i know your just dying to rush to your cupboard and make one!
 I'm sorry I didn't take progress pictures. Stupidly I left it till the day before and was in a hurry... AHH...
So, to make yours...
You need
Tulle
Satin ribbon 1/2"wide and I needed 50cm length (20 inches)
strip of elastic 1/4"wide
Bling Button
Tiny Diamante
Hot Glue gun

Measure around your leg/thigh where your garter will sit. Eden's was 48cm...
Cut 4 lengths of tulle around 6 inches wide and about 60 inches (150cm) long.
Lay them all on top of each other
Starting from one end... Sew a long (longest stitch length your machine will go) running stitch down the centre of the strip.
Grab one end and tie the two threads in a knot.
Pull the bobbin thread... and slowly gather your Tulle up until your happy with the gathering or until you reach your desired length.. I added 2cm onto Edens length.. so I gathered it til it was 50cm.
Take your piece of Ribbon.. Lay it down to cover the centre seam and pin in place.
Carefully sew down left and right side of ribbon (normal stitch length) as close to the edge as possible. This gives you a little tube.
Thread your elastic into the tube..under the ribbon but above the tulle.
Tighten your elastic so your garter gathers in and is stretchy.
Sew your ends together.

Trim of any excess tulle to your desired width.....and your first part is done!!
Now for decorating...
I hand sewed my diamante jewel/button into the centre...
Then using tweezers and hot glue gun, Pick up a diamante with your tweezers, touch it lightly on the hot glue and stick it on your garter...
Add as many or as little as you want.. and
YOUR DONE!!!  
Then comes the tradition of throwing the Garter... Well, finding it first!
And Shhhh Its a secret... but FYI... She kept the real one... and we got a fake one for her hubby to throw :)
It was such a great day... Love you Ede xx


signature

LinkWithin

Related Posts Plugin for WordPress, Blogger...