


*I had such a great time at the Craft Fair on Wednesday.. I bought a few bits and pieces and the makings for my next quilt and pattern. I'll tell you all about it and show you some pictures soon.
* I'm headed back to the Show tomorrow to be with Saffron on her stand, so if you will be there, come visit us and say hi!!
* Drum roll.............Its my Blogiversary THIS WEEKEND!!! Can you believe it?? Its been 12 months! Time has flown by in blog land. I have a great Giveaway and Pattern Sale kicking off tomorrow, so pop back so you don't miss out!
But for today, I'm ready to Quilt my QC Quilt. If you missed last class on Machine Quilting, you can read about it HERE and if you want to catch up with a few of the classes, you can follow along HERE.
OK, I was a little undecided on what design I should actually go for. I have really enjoy straight line quilting, 1/4" off the seam allowance and was going to go for that. But, i really felt the quilt needed the Zig Zags to remain the focus and not have crossing lines intersecting them... SO... I decided to follow the Zig Zag and quilt in between them like this...

Are you ready to Quilt?? and wanna know how to start???
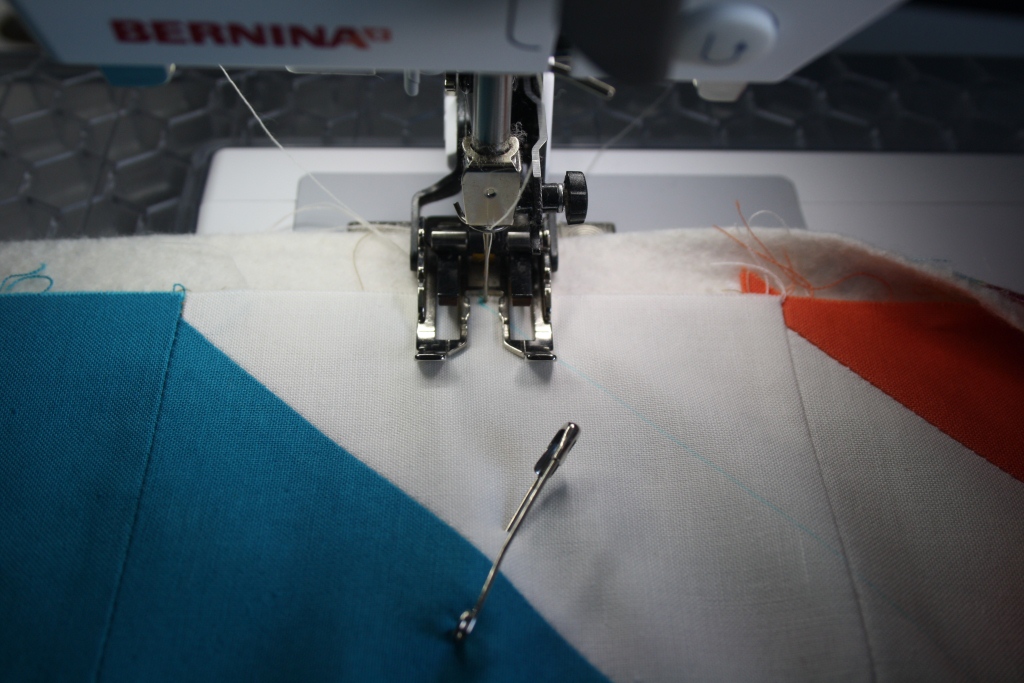
Step 1, I mark my Quilt if i need to. For this Quilting design, I needed to.I use a water soluble quilting marker/pen and put a small Dot in the centre of the seam. If you look closely you can see them.


Step 3, Start your Quilting at the centre and always work right. You only ever want to have 1/2 your Quilt rolled up under your machine at any time. The majority of your quilt should be on the left of your centre and you work of the right side of your Quilt. To understand this better, I'll show you how to I do mine.
For this quilt I'm working horizontally. I find the centre of the quilt top on the Left side. This is my starting point. In between the orange and the blue zigzag is the centre, so this is the one I sew first. When you start in the centre, the first couple quilt lines are the hardest. This is because while your quilting your working to fit 1/2 your quilt under the throat of your machine. I find this easier to manage if I roll up the right side of the quilt to allow it to fit through. So,
Lay your quilt down flat, roll up the right side of my Quilt till you reach the part your sewing. Put your Quilt sandwich under your walking foot.
Just before your first dot, do a few little reverse/back stitches to secure. When you get to your dot, put your needle in the down position.


The next step is to work on the bottom section. Turn your quilt upside down so the pink section you have just quilted is at the bottom and the blue section that needs to be Quilted is at the top. You repeat your quilting the same as the above step.. By working across your quilt again and still working on the right side of your centre. Does that all make sense??
Well, I'm off to finish Quilting the rest of mine... I hope this has helped you and email me or leave a comment if you have any questions!!
Don't forget to come back tomorrow to celebrate with me!!

WoW! Lookin' great. Can't wait to see the finished product!
ReplyDeleteYou're the second person I've seen wearing gloves - can I ask why people wear them to quilt?
ReplyDeleteCan't wait to figure out how I'm quilting my QC Quilt! I bought some gloves at the hardware store while there with Hubbie!
ReplyDeletebec this is so helpful you dont even know. do you wear the quilts for extra grip? it all seems so professional. i'd love to make this quilt...i wonder where the pattern is from?
ReplyDeletebeautiful work again. thank you!x
I am about to start quilting. Tonight, actually. I hope it turns out.
ReplyDeletehow you've done-last photo, if both hands in the frame?!:)))
ReplyDeleteDoes this mean that when you turn the quilt around to do the bottom you still quilt left to right, even though now it would have been right to left. You know, because it was rotated. I didn't quite understand.
ReplyDeleteI was also wondering why the gloves?
Great tips, Bec! I've done free motion quilting, but I've never machine quilted using a walking foot before. I'm getting close to starting the airplane quilt. I'm going to try quilting 1/4 inch from the ditch like you recommended. Thanks again for a great post.
ReplyDeleteI'm sure Bec will have an answer about the gloves too, but I wear the gloves because they help you hang on while maneuvering the quilt under the needle. The gloves are textured so they stick a bit to the fabric so you don't have to worry about slippage while you're working. This is key for free motion when you really need to be pulling and pushing the quilt around to get the design. Those gloves were one of my best quilting purchases!
Zigzag is a perfect quilting choice. We're almost done!
ReplyDeleteI was having this problem with my star jewels top. How to quilt it that is. Finally just went for it and I think it turned out fairly well:)
ReplyDeleteCongrats on your 1 yr Blog anniversary!!!
Beautiful...can't wait to see the finished product!!
ReplyDeletebeatifful
ReplyDeleteI really do like the zig zag quilting with your quilt. It really sets off the entire quilt. Such an awesome looking design and the colors are great.
ReplyDeleteHi Rebecca! Happy blogiversary! I can't believe it's only 12 months - you done so much and your blog is so good! Thank you for ideas, inspiration and the usefull lessons!
ReplyDeletexxx Teje
Ps. Quilting with zig zag is perfect for that quilt!
here is my machine quilting share (I decided to do stitch in the ditch since I had lots of corners misaligned. oh well!
ReplyDeletehttp://www.serenityinstamping.com/2011/07/swipe-on-swipe-off-and-some-sewing.html