


Quilt Class 101 - Week 5
Constructing your Quilt Top (Part A)
Most Quilts are made up of fabric blocks sewn together. Sometimes we often look at a quilt and think how did they sew that one together. I like to think of it like a magic trick. On face value you wonder how it was done... But once it is broken down for you..ie a Quilt Pattern, It all of a sudden becomes so simple. You wonder how you didn't see it that way before..
Last weeks lesson I showed you a tip on how we could sew our blocks together. So you should now have a pile of blocks looking like this...

If your struggling on making so many 1/2 Square triangle blocks..
I do a little technique called Chain Piecing.

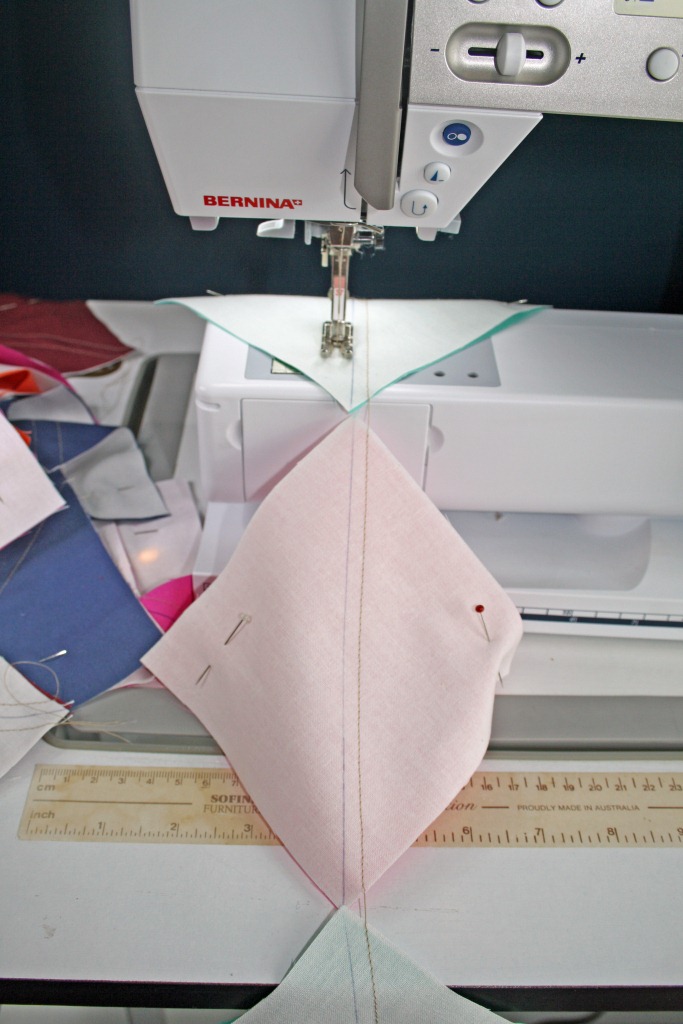
When your sewing each block, instead of at the end, Lifting your presser foot, dragging it out and snipping the thread, I sew my blocks continuously. I have a pile of the blocks sitting ready to go. I feed the first one in...then I continue to sew off the edge and I grab the next block. I line it up and feed it under the foot. I don't lift my presser foot, I just continue to feed each block in one after the other. For this particular block, I sewed down the left side of the line on all my blocks. They are all joined by a chain of thread. I then turned all the blocks and sewed again down the left side.. Continuing to feed each block through without lifting my foot.
Once you have them all sewn, in a long chain...

You just snip the chain of thread in between each square.

I find it saves alot of time.. and quick if your doing lots of the same piecing.
Rachael has another chain piecing technique you could follow here.
Once you have these.. and you iron them all out. Its now time to construct our QC Quilt. With each of my quilts, I like to play around with the designs... just to try out new patterns, layouts.. they can lead to inspiration for future quilts. Here are some of the designs I played around with today.

Here is the Layout for the QC QUILT.

The layout consists of
12 Blocks Per Row...
and 2 Rows for each colour.

Lay out all your blocks.
To Assemble your Quilt.
Start at the top row... Sew your blocks together. Start from the left block and work your way across until they are all joined together in that Row.
Next, Sew each block together in Row 2..

Continue Row by Row until you have all the blocks in each row joined.
Then Start at the top and sew Row 1 and Row 2 Together. Then add each row on until your entire Quilt Top in joined and one piece. Take care to sew an even 1/4" seam. I sew with a regular straight stitch length of 2.4 on my machine.
I will go into more detail tomorrow in piecing your rows together in
Constructing your Quilt Top Part B...
But if your wanting to get stuck into it.. You may want to re-read Cindy's Tutorial about Pinning..for lining up those seams accurately. You can also read HERE and Amy has a great Tutorial HERE for piecing.
I hope your enjoying Quilt Class 101..If you have missed a few of our classes... You can catch up HERE
Share your progress or tutorials or even your half square triangle block designs by linking up below..

What an awesome collection of photos showing you what you can do with half square triangles! I want to try some of those layouts now!
ReplyDeleteHalf triangles are fab! so many options, I like the straight lines looks great.
ReplyDeleteI love how many options there are with these triangles!
ReplyDeleteGreat tutorial! I love, LOVE the colors of this quilt!
ReplyDeleteJennifer :)
haha bec, this is funny...today i decided i wanted the next quilt i make to be a chevron and was going to google how to do it and here you are with instructions :)
ReplyDeletexxx
I am always amazed at all the ways HSTs can be put together to make such different and exciting designs. I am really enjoying your lessons.
ReplyDeleteThanks for showing the different layouts. They're simply gorgeous! The other day I was sewing my HST using scraps from another project. I did chain piecing and it went fairly quick. After reading this post, I'm motivated to square up my blocks to make a scrappy quit. Great tutorial!!
ReplyDeleteIt's been ages since I did any HST's but your post has made me want to do a quilt out of some. I love the zig zag you have chosen and I also loved the diagonal stripe you showed. I love your blog, it's inspired me to finally start my own, thanks
ReplyDeleteLawsonandlotti.blogspot.com
I love chain piecing! There is something quite hypnotic about it!
ReplyDeleteHi Rebecca, thank you for all the options for our HST. I am leaning toward trying the pin wheel but wanted to ask if you will show options when it comes to quilting the top for pinwheels? Or am I best (this is my first quilt) to stick to the class pattern?
ReplyDeleteMy favorite part of this post is all the variations you showed with HSTs. Yahoo!
ReplyDeleteOkay, question. Are we not supposed to backstitch as Rachael says in her directions? And if not is this just when chain piecing or always?
ReplyDeleteYou quilt looks so pretty! Thank you so much for doing this tutorial. I love it =D
ReplyDeleteI am playing catch up with you all... I will be using these techniques to make a quilted sewing machine cover, my very first quilting project! Question: Do you think it's ok to use a zipper foot when seaming 1/4"? I know there are special feet for quilting, I don't have one and don't expect my accessories to arrive (APO) in a timely manner... so, has anyone used a zipper foot in lieu of a quilting foot? Thanks!
ReplyDeleteSo many choices and thanks for all the tips!
ReplyDeleteI've finally finished the sewing of the squares and cutting into triangles and I'm finally doings first row of piecing together. But I'm really struggling to get the points of the triangles to line up in the middle of the zig zags - any good tips? Thanks so much - cant wait to get on with it!
ReplyDelete